Lab tutorial
Teaching Robots to See
Convolutional Neural Networks, YOLO, and how to train a detector that works
Press → to advance · S speaker notes · Esc overview
The plan for the hour
What is a CNN?
How a computer finds patterns in pixels
YOLO object detection
From "what is it?" to "what and where?"
Training, practically
Data, settings, reading results, fixing problems
Live notebook
We train a YOLO model together and look at its predictions
Part 1
What is a CNN?
Convolutional Neural Network
The problem
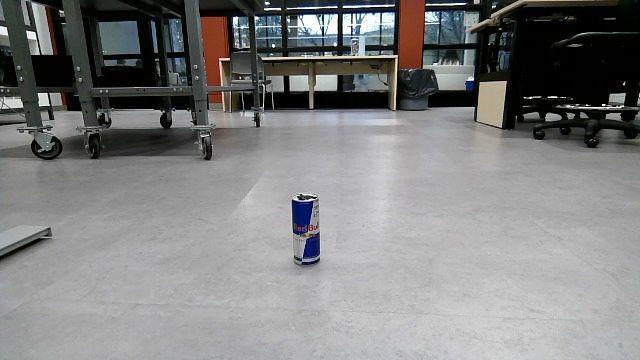
You see an object on the floor instantly.
The robot sees…
640 × 360 × 3
= 691,200 numbers
Our job: turn those numbers into "object here, 92% sure".
An image is just a grid of numbers
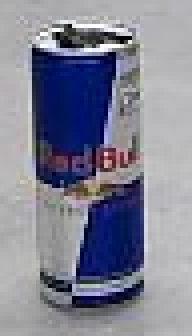
Zoom in on the object…
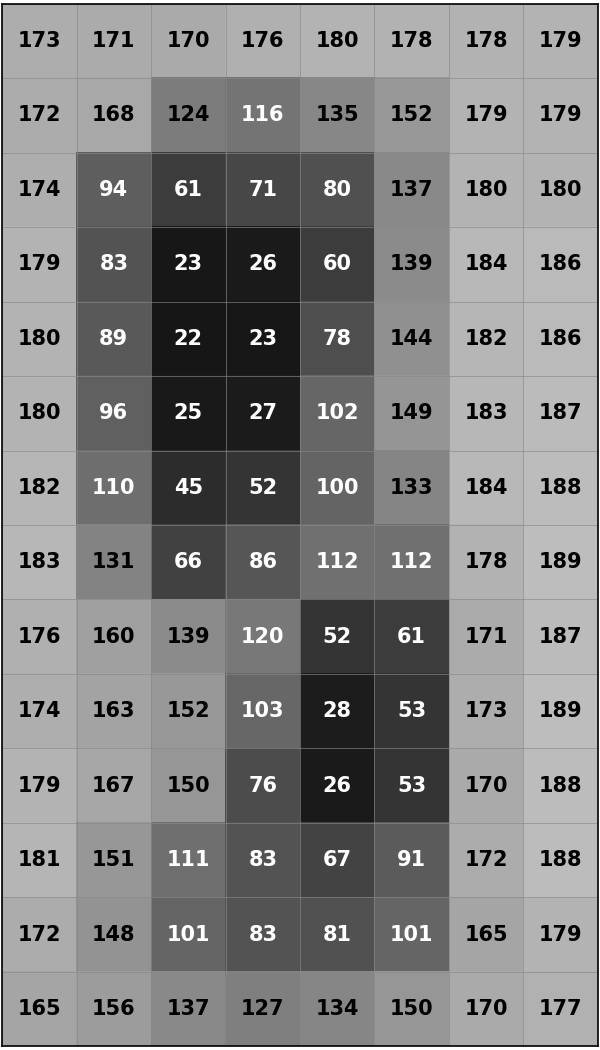
…and it's just brightness values (0 = black, 255 = white)
Why not just write rules?
Hand-written rules
if pixel is blue and the region is tall and thin and…
- Lighting changes every colour
- Distance changes the size
- Knocked over? Different shape
- Half hidden behind a chair leg?
Breaks almost immediately.
Learn from examples
Show the computer thousands of labelled pictures and let it work out the rules itself.
That's machine learning. A CNN is the kind of model that is especially good at learning from images.
This is what we'll do.
The key idea: a small sliding filter
Multiply the 9 pixels by the 9 filter numbers and add them up → one output number.
Slide one step. Repeat everywhere.
A filter (or kernel) is a tiny grid of numbers, often 3×3.
It slides across the whole image. At every position it gives one number: "how much does this patch look like my pattern?"
The output grid is called a feature map.
This sliding multiply-and-add is the convolution in "Convolutional" Neural Network.
Worked example: an edge detector
Flat patch (all the same)
| 50 | 50 | 50 |
| 50 | 50 | 50 |
| 50 | 50 | 50 |
| -1 | 0 | 1 |
| -2 | 0 | 2 |
| -1 | 0 | 1 |
(-50 - 100 - 50) + (50 + 100 + 50)
= 0 "no edge here"
Dark → bright (an edge)
| 20 | 20 | 180 |
| 20 | 20 | 180 |
| 20 | 20 | 180 |
| -1 | 0 | 1 |
| -2 | 0 | 2 |
| -1 | 0 | 1 |
(-20 - 40 - 20) + (180 + 360 + 180)
= 640 "strong edge!"
Multiply each pair of matching cells, then add all nine results.
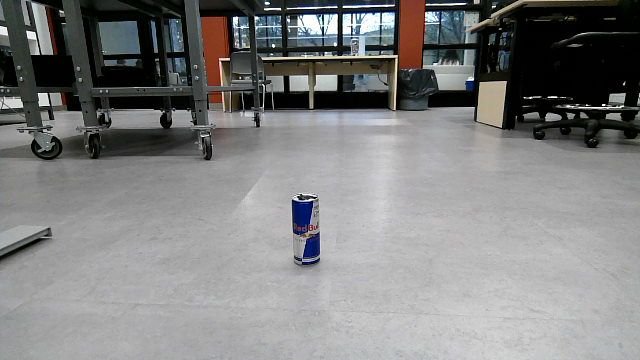
Filters on a real robot frame
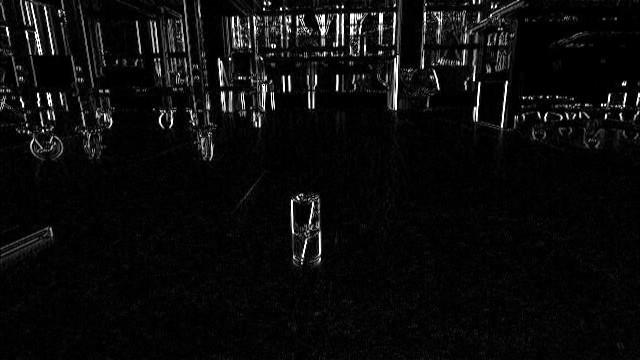
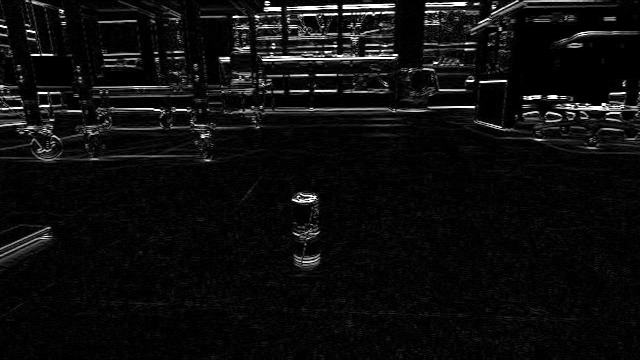
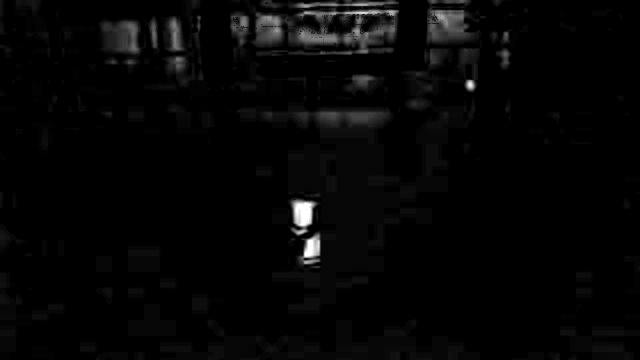
Each filter makes its own feature map: bright where its pattern appears.
The big trick: the network learns the filters
We hand-picked the edge filter above. A CNN doesn't need us to.
Every filter starts as random numbers. During training, the network adjusts them until they detect whatever helps it get the answer right.
The numbers inside the filters are the weights. "Training" = finding good weights.
Stacking layers: simple → complex
Each layer runs filters over the previous layer's feature maps, so it finds patterns of patterns.
Two helpers between the filters
ReLU: keep the positives
After each convolution, set every negative number to 0.
| -3 | 5 |
| 8 | -1 |
| 0 | 5 |
| 8 | 0 |
Sounds trivial, but without it stacking layers adds nothing new. It lets the network learn complex, non-straight-line patterns.
Pooling: shrink it down
Take each 2×2 block and keep only the biggest value.
| 1 | 3 | 2 | 0 |
| 6 | 2 | 1 | 4 |
| 0 | 7 | 9 | 1 |
| 3 | 1 | 5 | 2 |
| 6 | 4 |
| 7 | 9 |
Halves the size each time: faster, and the next layer "sees" a wider area.
A whole CNN, end to end
How does it learn? Guess → check → nudge
- Guess: run a batch of training images through the network
- Check: compare with the correct labels → a single "how wrong" score, the loss
- Nudge: adjust every weight a tiny bit in the direction that lowers the loss (gradient descent)
- Repeat thousands of times
One pass over every training image = one epoch.
Part 1 recap
- An image is a grid of numbers.
- A filter slides over it and lights up where its pattern appears → a feature map.
- Layers stack: edges → shapes → parts → objects.
- The filter values (weights) are learned from labelled examples by repeatedly reducing the loss.
Part 2
YOLO
You Only Look Once: real-time object detection
Classification vs detection
Classification
"This image contains an object."
One answer for the whole image. But where is it? How many are there?
Detection
"Object, here, 92% sure."
A box + a class + a confidence, for every object. A robot needs this to drive to the object.
What a detection actually is
Each detection is a handful of numbers:
- x, y: the box centre
- w, h: its width and height
- class: which kind of object
- confidence: how sure (0–1)
Training labels use the same idea. One text line per object:
class  x_c    y_c    w      h
0      0.478  0.636  0.053  0.217
Positions are fractions of the image size (0–1), so they don't depend on resolution.
The slow way vs "You Only Look Once"
Sliding window (old idea)
Run a classifier on thousands of crops, at every position and size.
Seconds per frame. Too slow for a robot.
YOLO
Run the CNN once on the whole image. It outputs all boxes at the same time.
Milliseconds per frame. Real-time.
How YOLO divides up the work: a grid
The final feature maps line up with a grid over the image.
Each grid cell predicts: "is there an object centred in me? If so, what is it and what's its box?"
The highlighted cell holds the object's centre, so it is responsible for predicting that box.
Every cell answers at once, so the whole image is handled in one pass.
Small and large objects: three grids
Fine grid
80×80 cells
small / far-away objects
Medium grid
40×40 cells
medium objects
Coarse grid
20×20 cells
large / close objects
(for a 640×640 input) An object far away is only a few pixels wide. Close up it fills the frame. YOLO predicts at all three scales.
Inside YOLO: backbone, neck, head
Measuring box overlap: IoU
Intersection over Union scores how well two boxes match:
- 1.0: perfect match
- 0.5: decent, usually counted as "found it"
- 0: no overlap at all
Used to score predictions against labels, and to spot duplicate boxes (next slide).
Cleaning up: confidence threshold + NMS
Raw output
Hundreds of guesses, many overlapping, some very unsure.
After clean-up
- Confidence threshold: drop boxes below e.g. 0.25
- Non-Max Suppression: of boxes overlapping a lot (high IoU), keep only the most confident
Choosing a model size
| YOLO11 model | Parameters | Accuracy (COCO mAP50-95) | Speed |
|---|---|---|---|
| n (nano) | 2.6 M | 39.5 | fastest |
| s (small) | 9.4 M | 47.0 | fast |
| m (medium) | 20.1 M | 51.5 | medium |
| l (large) | 25.3 M | 53.4 | slower |
| x (extra large) | 56.9 M | 54.7 | slowest |
Same design, different width/depth. On a robot's small computer, speed matters: start with n and only go bigger if you need to.
Figures from the Ultralytics YOLO11 docs, measured on the 80-class COCO benchmark.
Don't start from scratch: transfer learning
Ultralytics provides models already trained on COCO: 118,000 photos, 80 everyday classes (people, cars, cups…).
Their early layers already know edges, textures and shapes. Those skills transfer to almost any object.
We start from those weights and fine-tune on our own images. Minutes of training and a few hundred images, instead of days and millions.
Part 2 recap
- Detection = what + where: box, class, confidence.
- YOLO runs the CNN once; grid cells at three scales predict boxes.
- Confidence threshold + NMS clean up the raw output.
- IoU measures how well two boxes overlap.
- Start from a pretrained model (usually nano) and fine-tune.
Part 3
Training, practically
A step-by-step guide to getting a detector that works on your robot
Training is a loop, not a single step
Your first model will have weaknesses. The skill is finding them and feeding back the right data.
Step 1: Collect the right images
Rule #1: train on images that look like what the model will see when you use it.
Internet / dataset photos are a good start, but are usually close-up, centred and well lit. Your robot's camera sees something different: low angle, far away, odd lighting, motion blur.
This mismatch is called domain gap, and it is the #1 reason a model that scores well still fails on the robot.
Capture variety
- Near and far
- Different angles and positions in the frame
- Bright, dim, backlit (windows!)
- Upright, lying down, partly hidden
- While the robot is moving (blur)
- Different backgrounds and rooms
Also collect images with nothing in them
Background images (or negatives): frames where your object is not present.
They teach the model what not to fire on: bins, chair legs, bottles, anything that looks a bit similar.
A background image has an empty label file.
Ultralytics suggests starting at ~0–10% of images. Add more if you see false alarms.
Step 2: Label carefully
Tools: Roboflow, Label Studio, CVAT (all free tiers), all export "YOLO format".
- Boxes tight around the object's visible extent
- Label every instance in the image, even small or partly hidden ones
- Be consistent: decide the rules once (do half-visible objects count?)
- Class IDs start at 0 and match
data.yaml
Missing vs empty label file
Empty img_042.txt → "there is nothing here" (a negative).
No file at all → also treated as a background image by Ultralytics.
So an image you forgot to label silently teaches the model that the object isn't there. Check that every image with an object has its boxes.
Dataset layout
my_dataset/
├── data.yaml
├── train/
│   ├── images/   img_001.jpg  img_002.jpg …
│   └── labels/   img_001.txt  img_002.txt …
├── valid/
│   ├── images/
│   └── labels/
└── test/
    ├── images/
    └── labels/
# data.yaml
path: C:/path/to/my_dataset
train: train/images
val: valid/images
test: test/images
nc: 1 # number of classes
names: ["thing"] # class 0's nameEach image's label file has the same name, .txt instead of .jpg, in the matching labels/ folder.
Step 3: Split into train / validation / test
Train
~70–80%
The homework. The model learns from these.
Validation
~10–20%
The practice exam. Checked every epoch; used to pick settings and the best epoch.
Test
~10%
The final exam. Looked at once, at the end, for an honest score.
The model must never train on validation or test images, or the scores are meaningless.
The video-frame trap
Random split, frame by frame:
Neighbouring frames are near-copies, so validation images have twins in training. Scores look great, mean nothing.
Split in blocks of consecutive frames:
Validation frames really are new. Honest scores.
train validation
If you capture a stream of frames, don't shuffle them individually into splits.
Split by blocks (or by session or room) so that validation tests whether the model works on situations it hasn't seen.
Also remove near-duplicate frames: 50 copies of the same view add almost nothing.
What training gives you
runs/detect/train/
├── weights/
│   ├── best.pt      ← use this one
│   └── last.pt
├── results.png      ← loss + metric curves
├── results.csv
├── confusion_matrix.png
├── val_batch0_labels.jpg   ← correct boxes
├── val_batch0_pred.jpg     ← model's boxes
└── args.yaml ← exact settings used- best.pt: weights from the epoch with the best validation score (not necessarily the last).
- results.png: look at this first. Are losses going down? Did metrics level off?
- val_batch*_pred.jpg: look at the pictures! Compare with the
_labelsversion. - args.yaml: keep it, so you know exactly how each model was made.
Give each run a name= so they don't overwrite each other, and keep notes on what changed between runs.
Step 5: Reading the curves
Underfitting
Both losses still high, still dropping. Train longer, or check the labels.
Good fit
Both drop and level off together.
Overfitting
Train keeps falling, val turns up: it's memorising. More data and augmentation; best.pt + patience save the best epoch.
training loss validation loss
The metrics in plain English
Precision
"When it says object, how often is it right?"
Low precision = false alarms. Fix: more negatives, raise confidence threshold.
Recall
"Of all the real objects, how many did it find?"
Low recall = misses. Fix: more examples of what it misses, lower threshold.
mAP50
Overall score (0–1) where a box counts as correct if IoU ≥ 0.5. "Did it find the right thing roughly in the right place?"
mAP50-95
Same, averaged over stricter IoU levels 0.5 → 0.95. Also rewards tight, accurate boxes. Harder; usually much lower.
⚠ Good scores ≠ works on the robot
It's common to see mAP50 ≈ 0.99 and still have a model that fails on the robot. Why?
- The validation images are easy or don't look like the robot's view (domain gap)
- Validation frames are near-copies of training frames (the video-frame trap)
- Different runs used different validation sets, so scores can't be compared
The real test: run it on the robot camera.
- Keep a held-out test set of robot-camera frames, with and without the object
- Drive around and watch live: where does it miss? Where does it false-alarm?
- Compare models on the same frames
- Save the frames it fails on: that's your next batch of training data
Improving training: data first
| Technique | What it does | Impact |
|---|---|---|
| Images from your real camera | Closes the domain gap | huge |
| Add the failure cases | Targets exactly what the model gets wrong | huge |
| Background images | Fewer false alarms | big |
| Fix bad / missing labels | Stops the model learning wrong things | big |
| Data augmentation | Makes more variety from images you already have | medium–big |
| Pretrained weights | Starts from general vision skills | big (default) |
| Bigger model / more epochs / larger imgsz | More capacity, slower | small–medium |
Tweaking settings rarely beats better data.
Data augmentation: free variety
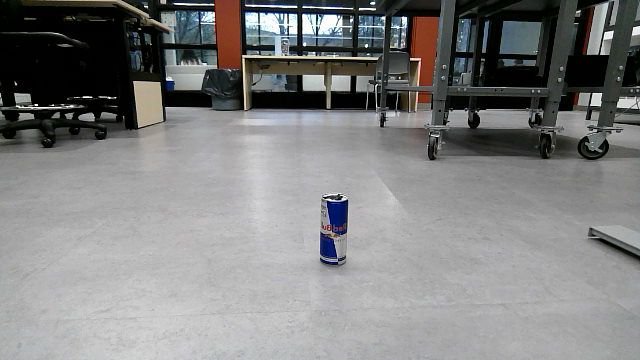
fliplr: mirror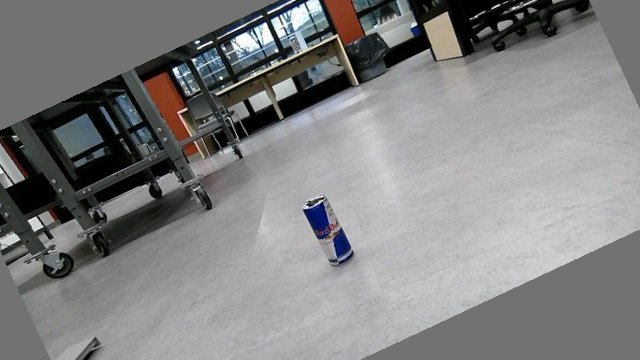
degrees: rotate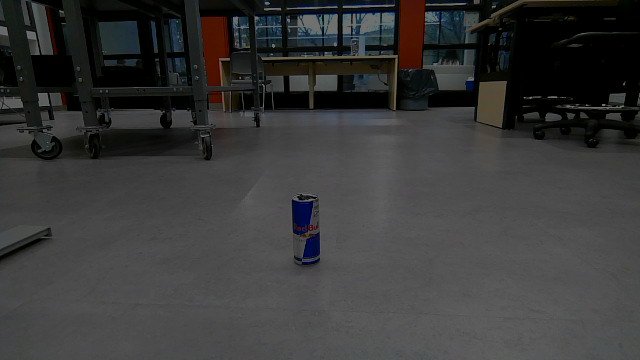
hsv_s / hsv_v: colour, brightness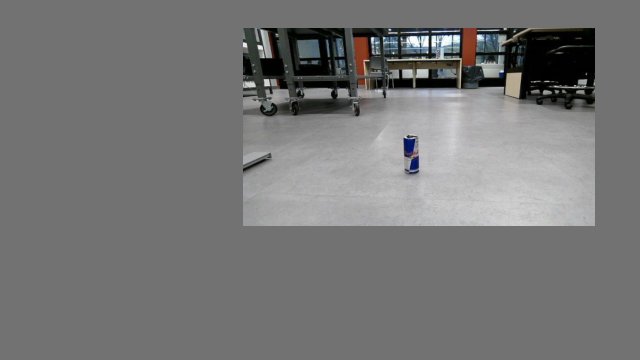
scale / translate: zoom, shift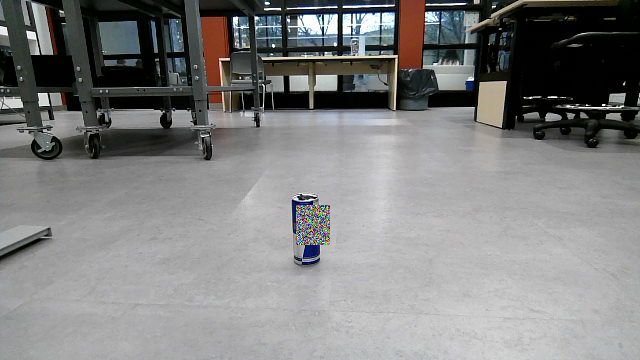
erasing: hide a patch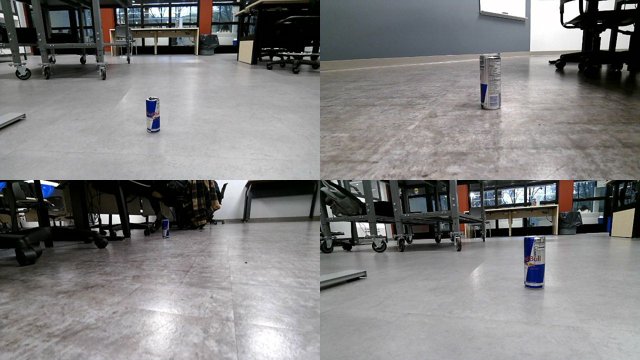
mosaic: 4 images in 1Applied randomly to training images every epoch, so the model never sees exactly the same picture twice.
Boxes are moved with the image automatically.
Picking augmentations: match real-world variation
| If, in real use… | Augmentation | Ultralytics arg (default) |
|---|---|---|
| lighting changes between rooms or times of day | colour / brightness jitter | hsv_h (0.015), hsv_s (0.7), hsv_v (0.4) |
| the object appears at many distances | random zoom | scale (0.5) |
| it can be anywhere in the frame | random shift | translate (0.1) |
| it can be tilted or knocked over | random rotation | degrees (0) |
| left/right doesn't matter | horizontal mirror | fliplr (0.5) |
| it can be partly hidden | random erasing / mosaic | erasing (0.4), mosaic (1.0) |
| up/down does matter (gravity!) | vertical flip: usually off | flipud (0) |
model.train(data="data.yaml", epochs=60, degrees=15, scale=0.7) # override any of themDon't add augmentations that create impossible images: they waste the model's capacity. Change one thing at a time and compare.
Run experiments like a scientist
- Train a baseline with default settings
- Change one thing (more data, one augmentation, model size)
- Give the run a clear
name= - Compare on the same robot-camera test images
- Keep what helped; write down what didn't
| run | change | robot recall | false alarms |
|---|---|---|---|
| baseline | dataset photos only | low | many |
| run2 | + background frames | low | fewer |
| run3 | + far-away images | better | fewer |
| run4 | + scale aug | ? | ? |
Example of a lab notebook table. Your numbers will differ.
Troubleshooting
| Symptom | Likely cause → fix |
|---|---|
| Training is painfully slow | CPU PyTorch. torch.cuda.is_available() must be True |
| CUDA out of memory | Lower batch (e.g. 8) or imgsz |
| Great val score, bad on robot | Domain gap or leaky split. Add robot frames; split by blocks |
| Boxes on things that aren't the object | Not enough negatives; raise confidence threshold |
| Misses far-away objects | More far-away examples; scale augmentation; larger imgsz |
| Misses tilted or lying-down objects | Capture them; try degrees augmentation |
| Works when still, fails when moving | Motion blur: capture frames while driving |
| Nothing learned at all, mAP ≈ 0 | Labels broken: wrong class IDs, wrong folder names, nc/names mismatch |
| Boxes flicker on and off live | Tune the confidence threshold before retraining |
What "working" looks like
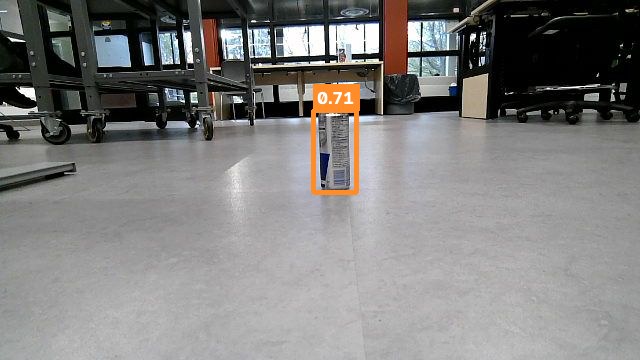
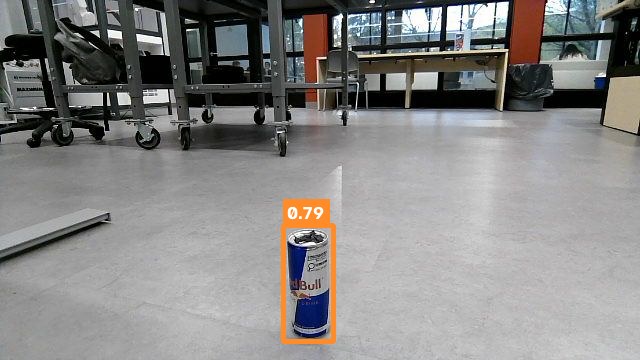
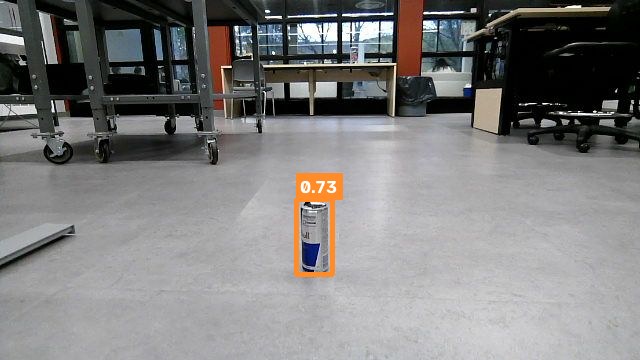
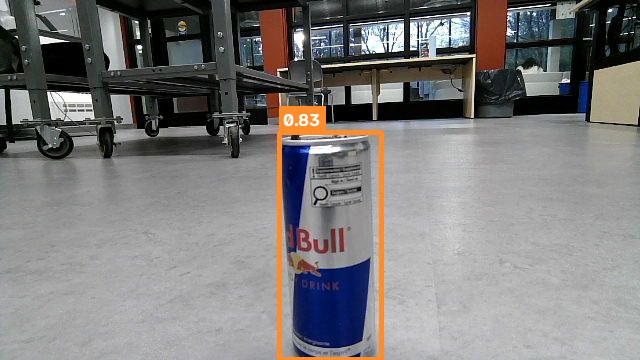
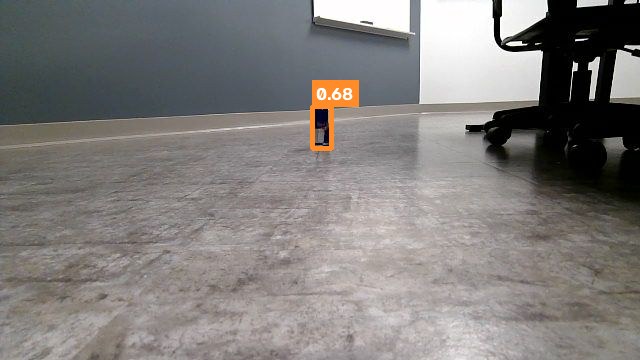
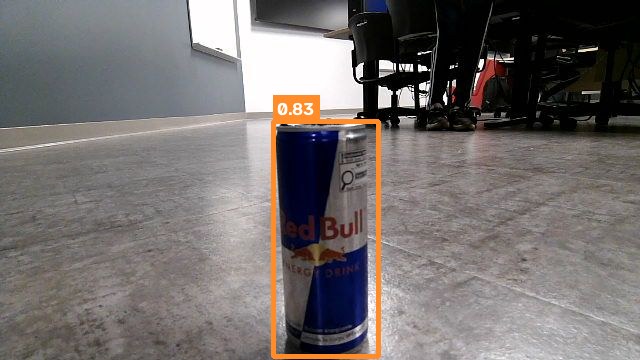
A fine-tuned YOLO11n on real robot-camera frames: different distances, positions and lighting. This is what you're aiming for.
Part 3 checklist
- Images from the robot's camera, lots of variety
- Background images included
- Every object labelled, tight boxes, class IDs from 0
- Split by blocks, test set kept sealed
torch.cuda.is_available()isTrue
- Start from
yolo11n.pt, default settings first - Read
results.pngand look at the prediction images - Test on the real robot, not just mAP
- Add failure cases → retrain → compare
- One change at a time, every run named
Part 4
Let's train one
Live notebook: a 4-class wildlife detector, from download to predictions
Summary
CNNs
Learned filters slide over the image, building up from edges to whole objects.
YOLO
One pass of a CNN predicts every box, class and confidence at three scales.
Training
Right data from the real camera, honest splits, test on the robot, iterate.
Questions?